
Manual Test:
Place reset tool over fault indicator’s dome so reset tool’s magnet is over the label on the side opposite from battery caps. Hold magnet in place for approximately 1 second.
The LEDs will begin to flash through a test sequence and will stop flashing once the test sequence is complete.
Manual Reset:
While LEDs are flashing, place reset tool over fault indicator’s dome so reset tool’s magnet is over the label on the side opposite from battery caps. Hold magnet in place for approximately 1 second.
The LEDs will stop flashing.
Battery Replacement
The FI-5A uses one 3.6V AA battery and one 3.6V C battery; both batteries have a wired connector. Replacement batteries are best purchased from SGS or an authorized distributor. Best practice dictates that when replacing batteries, users should replace both AA and C batteries.
To replace batteries, unscrew battery caps using a screwdriver that fills the screw cap channel. Disconnect existing batteries at white 2-pin connector; then connect replacement battery. Screw on battery caps. To ensure water-tight seal, apply 30-32 in-lbs force to AA cap and 32-34 in-lbs force to C cap until cap is flush with body
Installation of Fault Indicator
1. Pull open the Split Core CT using thumbs until it locks into place. Once the Split Core CT has been cocked, the unit will lock in the “open” position.
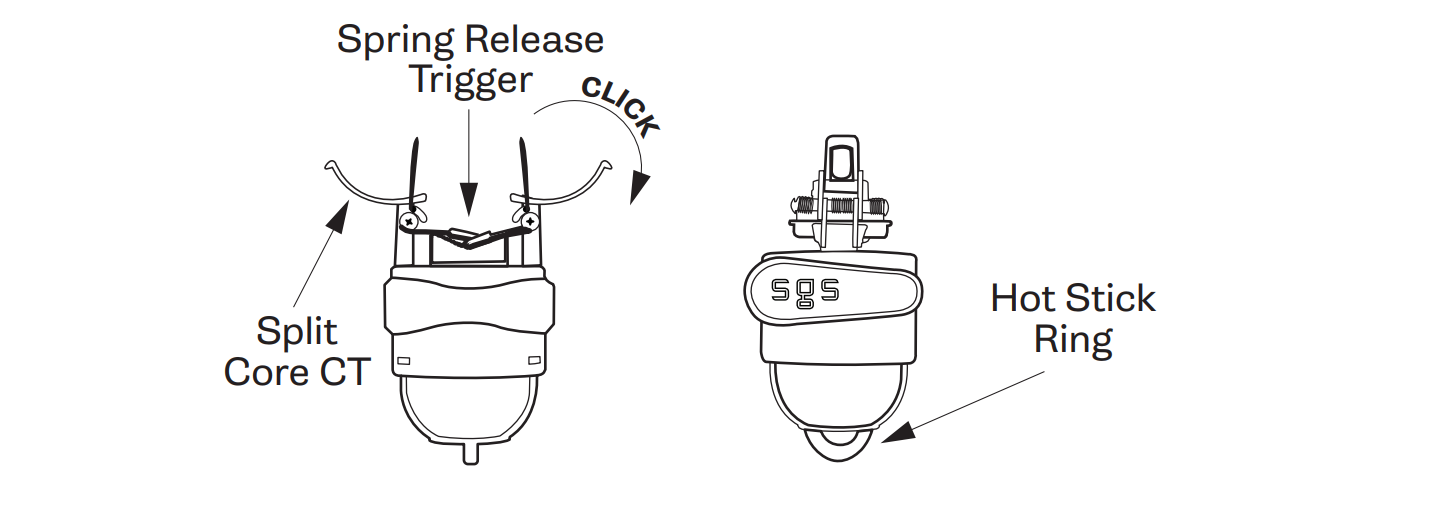
2. Attach the device to a shotgun stick.
3. Position the conductor between the open Split Core CT, and with a forceful upward movement, install the device to the line. When the Spring Release Trigger receives sufficient pressure, the spring will release, clamping the conductor and setting the device into place.

4. Open the shotgun stick and remove it from the device.